Motion Tracking in Continuum 2020 has never been easier or more accurate thanks to integrated mocha motion tracking, which completely replaces old Continuum, point tracking.
You can now harness the power of Mocha’s planar tracking engine to track and match footage directly into a scene. There are two ways to launch Mocha in Continuum filters. If you use the Mocha / Mask Track button in the PixelChooser you will find the same masking integration you are familiar with from previous versions of Continuum. But if you use the Mocha Motion Tracker button inside the “Motion Tracker / Mocha” group you will get a view optimized for extracting geometric data such as position as opposed to masks. Note that this still uses the same planar tracking engine under the hood.
IMPORTANT NOTE: While older projects created using the legacy point tracker can still be opened in Continuum 2019, new projects will require a mocha compatable host for all motion tracking going forward.
Available Parameters
Motion Tracker/ Mocha
To launch the built in Mocha Motion Tracker, click on the button and the mocha UI window will open.
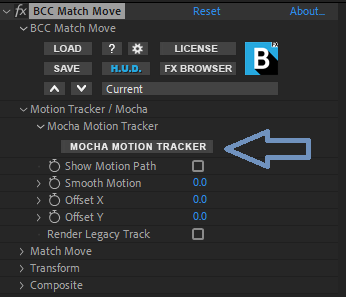
Inside of the Mocha UI there are two tracking layers that we need to be aware of:
- The blue crosshair represents the “surface,” or the position whose location will be exported back to the filter.
- The tracking layer , or the red circular region which defines the plane to be tracked.
Both of these will need to be moved to the chosen location you would like to track. Moving only one of these will result in undesierable results.
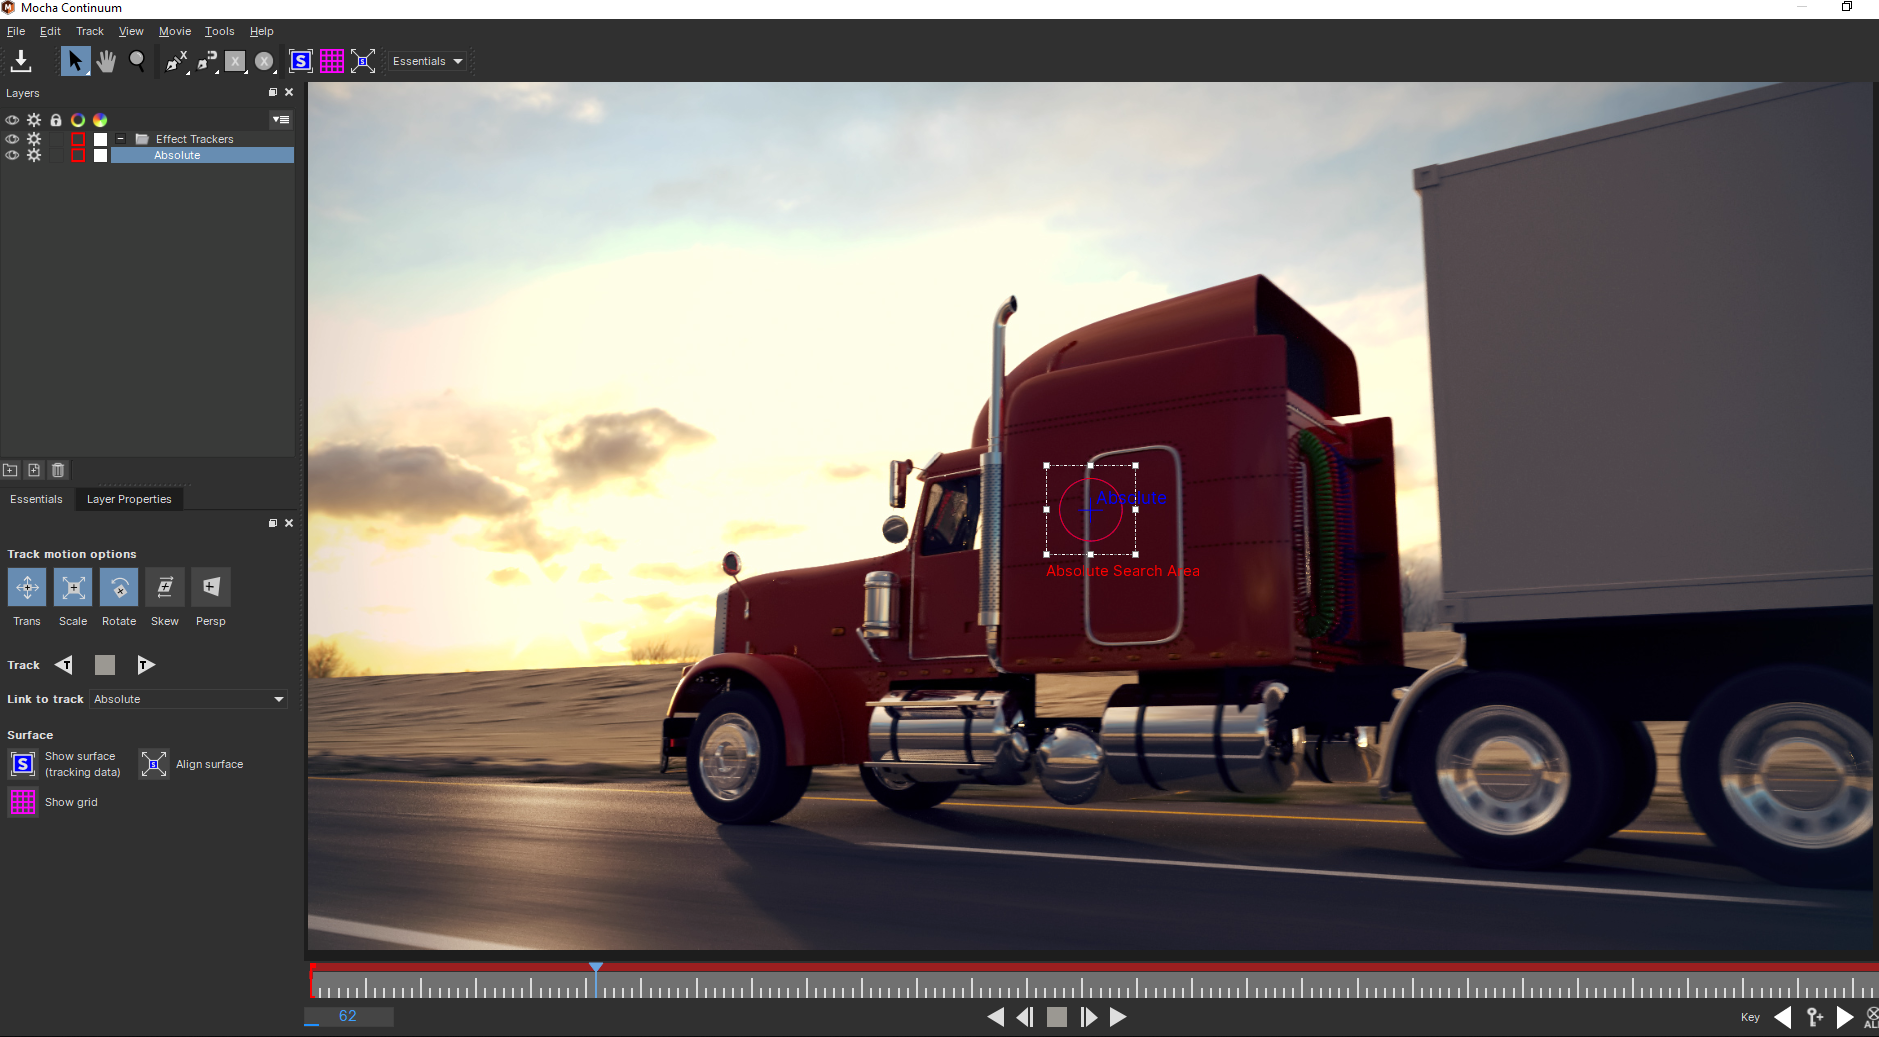
- With the desired tracking location set, we can click Track Forward to track the object in Mocha. It should be noted that Track Forward begins from the frame that your CTI is located on. If you are not at frame zero, you will want to move the CTI to frame zero before you track, or select Track Backwards after so that the whole timeline is tracked.
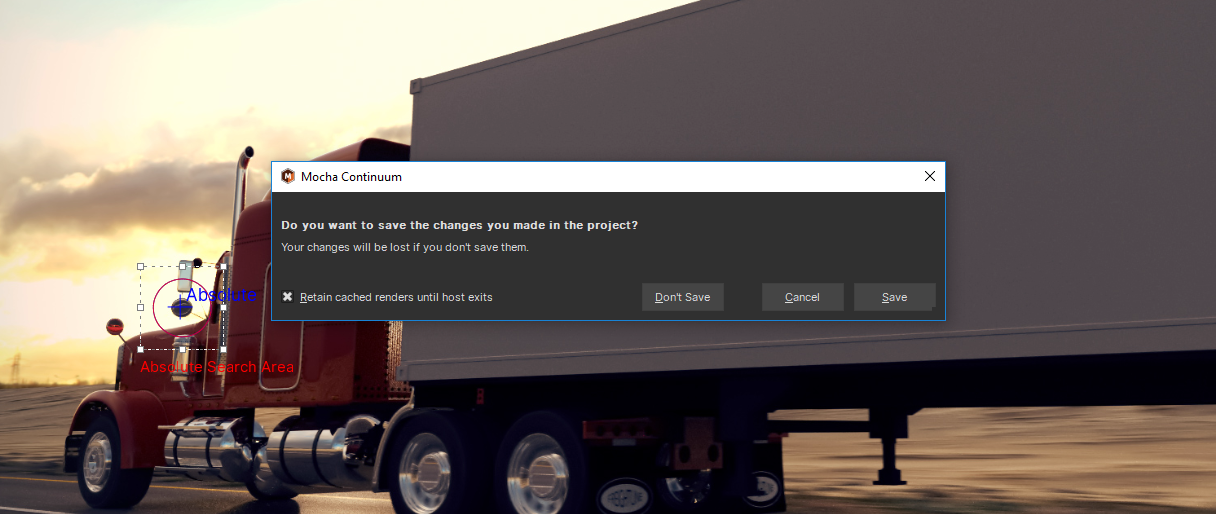
- Once you have tracked the specific point in Mocha, you can close the UI and save the tracking data.
The Show Motion Path checkbox will overlay the video clip with a representation of the mocha-tracked motion path.
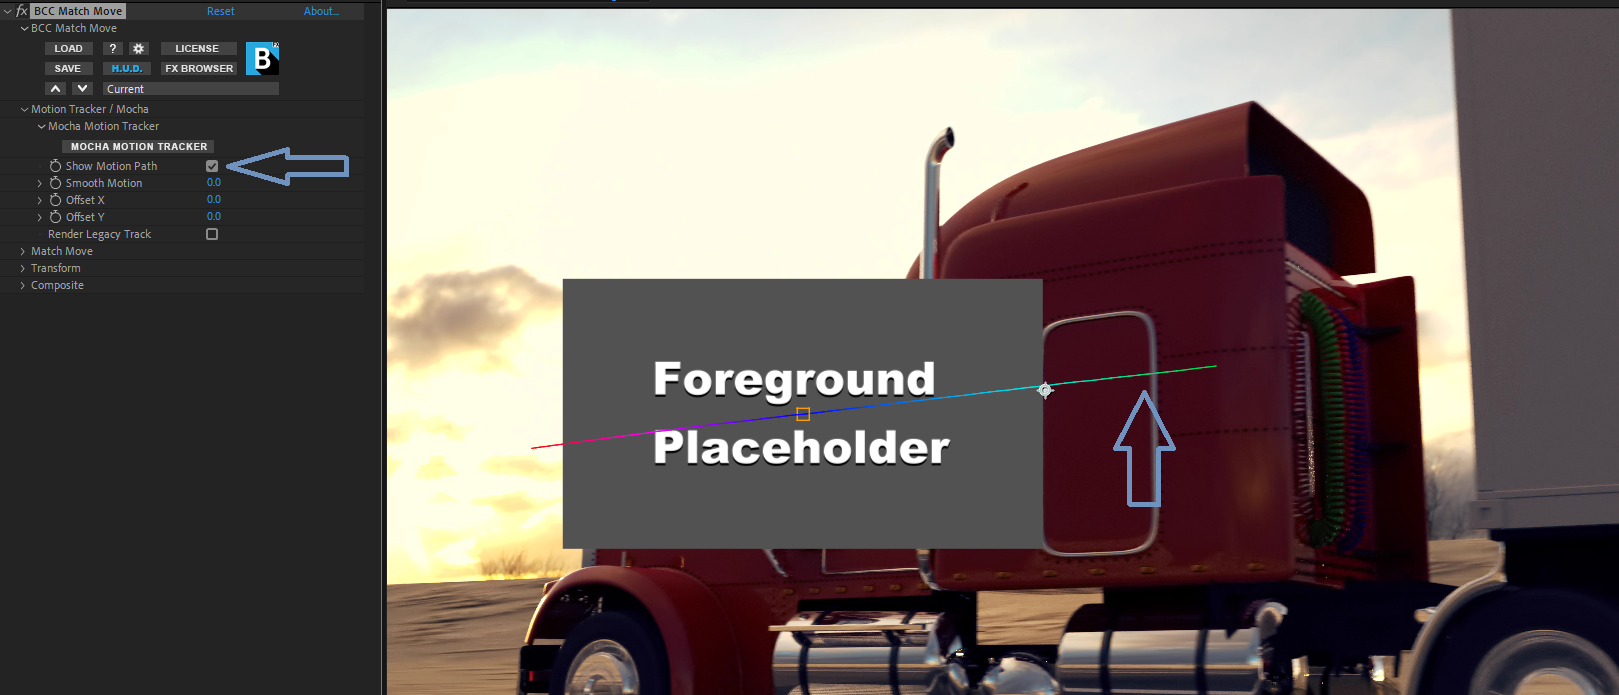
Smooth Motion helps to smooth the movement of the effect along the motion path. Higher values will result in a smoother movement.
Offset X is used to offset the tracking data along the X-Axis. This can be helpful if you need to adjust the position of your tracked parameter.
Offset Y is used to offset the tracking date along the Y-Axis. This can be helpful if you need to adjust the position of your tracked parameter.
The Render Legacy Track checkbox is helpful when opening up older projects that were created using legacy versions of the motion tracker. These projects will still open and render as expected, however, you may only use the Mocha Motion Tracker for any new motion tracking.
Match Move
The Render pop up allows you to select how the effect will be rendered. There are two options available:
- Move Over Background: will allow you to composite the forground layer on top of the background. This is the typical setting for final rendering.
- Move Only: will display the forground layer only. This is useful when you want to focus only on the forground layer.
 When the Render Mode is set to Move Over Background (Left) the placeholder will composite over the background. On the Right, the Render Mode has been set to Move Only; no background is rendered.
MM Forground allows you to set the forground layer for Match Move. Additional information on specific host workflows may be found below.
MM Background allows you to set the background layer for Match Move. Additional information on specific host workflows may be found below.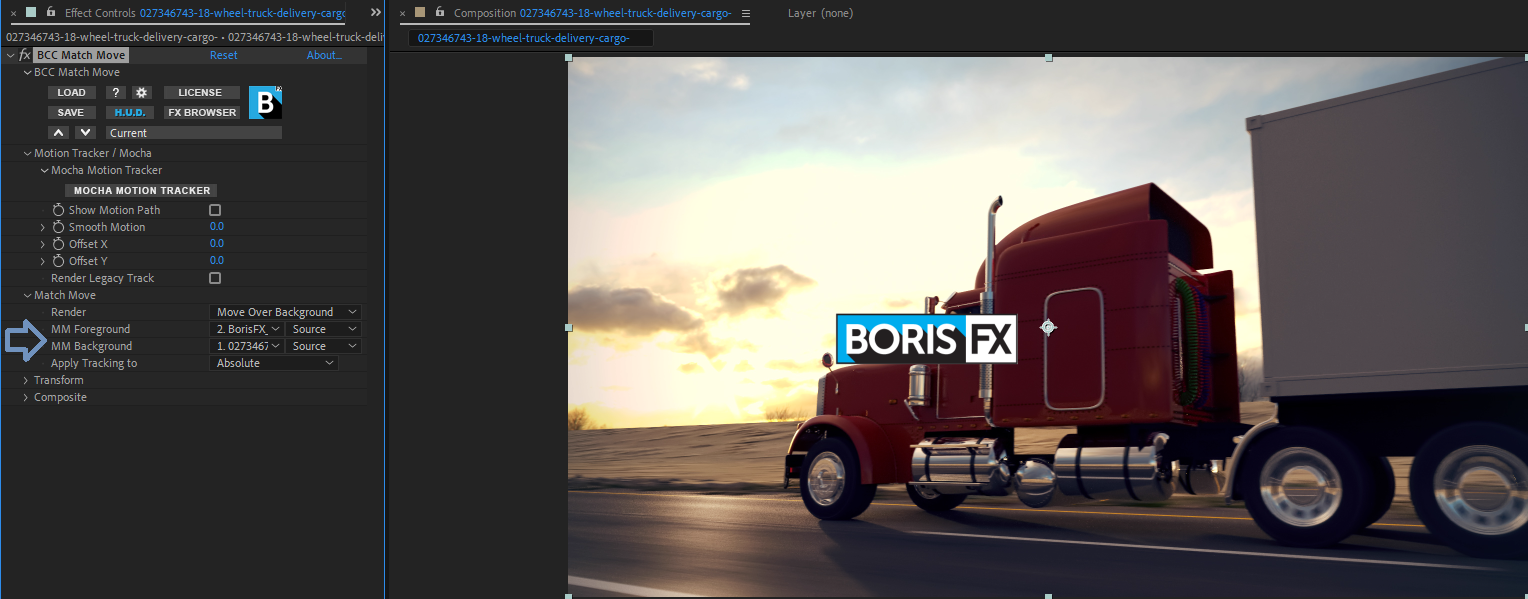
The Apply Tracking To parameter allows you to select how the match move motion is applied to the scene.
- None disables motion tracking
- Absolute links the motion of the forground image directly to the motion tracking.
- Relative will link the relative motion of the tracking to the forground image.
Transform
The Transform sub group contains parameters that enable you to adjust the placement, scale, and orientation of the inserted match move clip.
When the Lock Scale to X box is checked,changes to Scale X will also be applied to Scale Y values. This will allow for symetrical scaling of the media. When the values are linked you will not be able to manually adjust the Scale Y value. To adjust the Scale X and Scale Y individually, disable Lock Scale to X by unchecking the box.
Position XY: Sets the position of the media on the XY axis. To manually adjust the Position XY you will need to set the Apply Tracking to Relative.
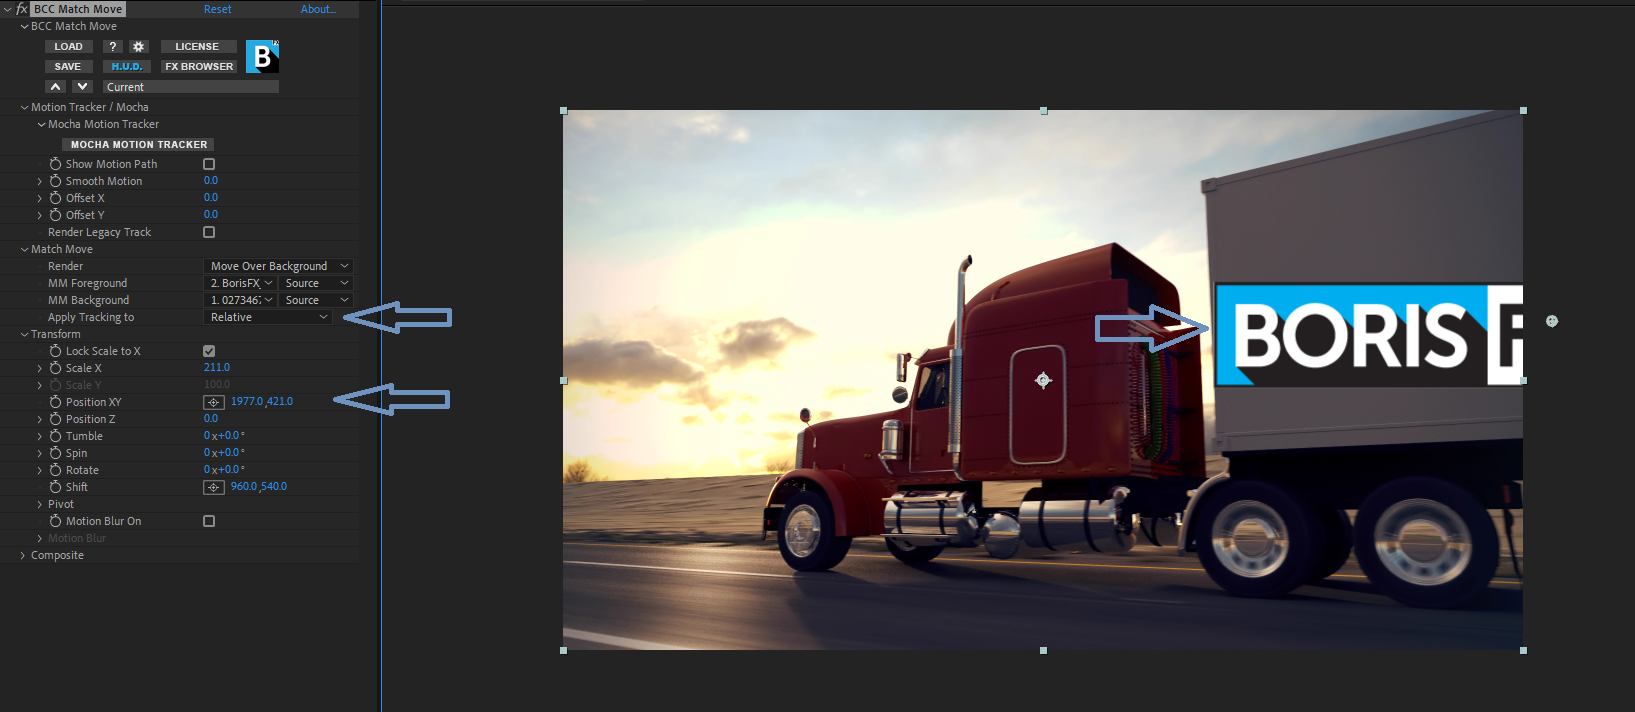
Position Z: Sets the position of the media on the Z axis.
Tumble: Sets angle of the media along the Z axis.
Spin: Sets the angle of the media along the YZ axis.
Rotate: Sets the angle of the media along the XY axis.
Shift: Used to offset the result.
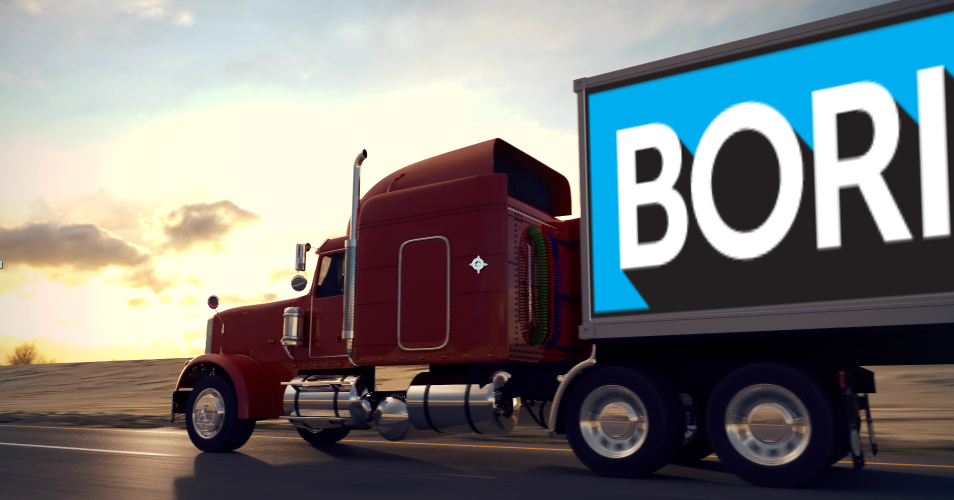
Within the Transform sub group you can also define the Pivot point of the media.
When Lock Pivot to Position is enabled, transformations to the Tumble, Spin and Rotate values will pivot along the point as defined by the Position XY value. Disabling this will allow you to manually set the Pivot XY and Pivot Z point.
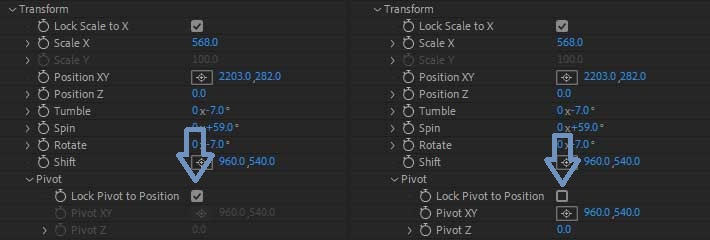
You can enable or disable Motion Blur in the effect by clicking the Motion Blur checkbox. When enabled, the Motion Blur Group becomes available. Here you can adjust the Smoothness of the blur, the Shutter Angle, and other parameters.

The Smoothness pop-up provides various levels of smoothing.
- rough provides a basic draft level of smoothness. Of the options it is the least render intensive.
- mediumprovides a basic level of smoothness.
- smoothprovides a more advanced level of smoothness.
- smoothestprovides the highest level of smoothness. Of the options it is the most render intensive.
Shutter Angle allows you to set the perceived shutter angle for the motion blur. Higher values result in more blur.
Adaptive Motion Blur: Disable for smoother results.
Composite
The Composite Sub Group contains parameter groups that allow you to adjust the media cropping, drop shadow, and lighting. These groups allow for the final blending of the match move effect.
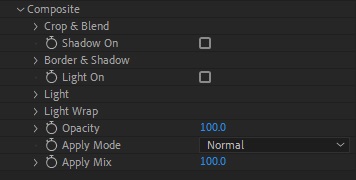
It is comprised of four mini groups.
- Crop & Blend
- Border & Shadow
- Light
- Light Wrap
Crop and Blend provides options for cropping the final output of the Match Move media. You can trim the visual area of the media by adjusting the Crop.
Crop Left: Crops the image along the left side.
Crop Top: Crops the image along the top.
Crop Right: Crops the image along the right side.
Crop Bottom: Crops the image along the bottom.
By using the Blend parameters you can easily fade the cropped edges.
Blend Corner Shape will allow you to define the shape of the blending.
- Rectangle will give you sharp, angular blending
- Round will allow for smooth, rounded blending.
By enabling or disabling the Lock Blend checkbox you can either adjust the Blend Left, Blend Top, Blend Right, and Blend Bottom all together, or individually.
Border & Shadow
The Border & Shadow sub-group contains parameter groups that allow you to adjust the media border as well as drop shadow. This group allows you to clearly define the edges of the match move media, as well as visually separate it from the background.
Border Corner Shape: This pop-up sets either round or square corners for the border.
Border Width: Sets the width of the border.
Border Opacity: Sets the opacity of the border.
Border Softness: Sets the softness of the border.
Border Color: Sets the color of the border.
Drop Shadow can be enabled by selecting the Shadow On checkbox
Shadow Distance: Controls the distance that the shadow is offset from the original.
Shadow Intensity: Controls the opacity of the shadow.
Shadow Softness: Controls the softness of the shadow.
Shadow Angle: Controls the angle of the shadow.
Shadow Color: Controls the color of the shadow.
Light Group
The Light Sub Group contains parameter groups that allow you to add, adjust and focus lighting effects on the media. It can be enabled by selecting the Light on checkbox.
Light Type: This pop-up is used to set the type of lighting.
Light Source XY: Sets the position of the light source along the XY axis.
Light Source Z: Sets the position of the light source along the Z axis.
Light Target: Sets the target for the spotlight.
Light Width: Sets width of the spotlight.
Ambient Intensity: Controls the level of ambient light.
Diffuse: Controls the diffuse light quality of the image.
Specular: Sets the width of the specular highlight.
Specular Falloff: Controls the falloff of the specular highlight.
Sweep Angle: Sets the angle of the light sweep.
Light Color: Used to set the color of the light.
Point Light at Source: When enabled will aim the light at the image source.
Apply Mode: This pop-up contains all of the apply mode compositing options for lights.
Apply Mix: Blends the selected apply mode with the normal apply mode.
In Addition to the Light parameters, Match Move has host specific Light Wrap parameters. Light Wrap reflects the background image around the edges of the foreground image to form a border. This creates the illusion that light from the background image is reflected onto the foreground image. This creates a more convincing composite by making it appear as if the images were shot in the same environment.
Wrap Lightness: Sets the lightness / darkness of the wrap.
Wrap Softness: Sets the softness of the wrap outer edge.
Wrap Width: Sets the width of the wrap.
Wrap Apply Mode: This pop-up contains all of the apply mode compositing options for the wrap.
Opacity: Controls the overall opacity of the effect.
Apply Mode: This pop-up contains all of the apply mode compositing options for compositing.
Apply Mix: Blends the current apply mode with the normal apply mode.
