Overview
The Optical Flow filter estimates the motion between two frames of video and renders an intermediate frame that interpolates the motion. The synthesized frame contains a mixture of the previous and next frames, each distorted by an amount determined by the optical flow estimation. With this filter, you can smoothly slow down or speed footage. Optical Flow generally produces smoother animations than a velocity remap filter.
Optical Flow synthesizes frames needed to complete the effect instead of blending adjacent frames as most retiming applications do. In essence, Optical Flow manufactures entire frames. Optical Flow analyzes the frames before and after the current frame to determine which pixels are moving. Then, only the moving pixels are synthesized, repositioned and composited into the new frame. The intervening information is created by warping the two frames, estimating where each individual pixel should be at every new in-between point.
Function
Presets and Common Controls
BCC filters come with a library of factory installed presets plus the ability to create your own custom presets and preview them with the BCC FX Browser™.
BCC filters also include common controls that configure global effect preferences and other host-specific effect settings.
For more information about working with presets and other common controls, Click Here.
Creating an Optical Flow Effect
You can apply Optical Flow directly to the clip that you want to affect. However, the duration of the effect is then limited to the duration of the source media. To create an Optical Flow effect that is longer than the duration of the source clip, follow the steps below.
-
Create a solid (After Effects, Premiere Pro), Color track (Red) or slug (Final Cut Pro) that is the same size as the desired source layer. Give this clip the duration that you want for the final effect.
-
Apply the BCC Optical Flow filter to the solid or slug.
-
Choose the desired clip or layer from the Source Layer menu.
-
Set Velocity to the desired speed. Values between 0 and 99 slow the clip, while values above 100 speed the clip.
The Source Layer menu sets the clip that is affected by the filter.
Velocity adjusts the velocity of the Source Layer. This value is expressed as a percentage of the clip‘s frame rate. If Velocity is 100, the source moves at the normal frame rate—that is, at the clip’s frame rate. If Velocity is 50, the source moves half as fast as the clip’s frame rate. If Velocity is 0, the source is a static image.
The InputFieldsmenu sets the input field dominance of the Source Layer media. Interlaced video has a field order which defines the order that the two video fields (upper and lower) display. Set this menu to match the field order of the source media. This means that you could input progressive scan media and output field-based media or vice versa.
- Choose Lower to use the lower field first.
- Choose Upper to use the upper field first.
- Choose Progressive for media that only includes whole frames, such as video shot at 24p or 30p, or converted film which was deinterlaced by the host using 3:2 pulldown.
Input Frame Rate: Determines that frame rate at which the animation will progress.
When the Offset Keyframe checkbox is selected, you can specify which frame from the Source Layer to output at a specific frame in the composition. Velocity is automatically calculated, even if it is a fractional value. For example, you want to output frame 20 at frame 28. Select this checkbox, create a keyframe at frame 28 and set Start/Offset Frame to 20. When this checkbox is selected, the Velocity, Input Frame Rate and Output Frame Rate parameters have no affect.
Start/Offset Frame determines which frame in the Source Layer is used as the output frame in the effect when the Offset Keyframe checkbox is selected and Velocity is adjusted. If the Offset Keyframe checkbox is not selected, this parameter sets which frame in the Source Layer is used as the first frame in the effect when Velocity is adjusted.
The Optical Flow Quality menu adjusts the quality of the output. The optical flow estimation algorithm has sub-pixel accuracy, so Best may not be necessary to produce good results. In general, if the motion estimation appears incorrect at Medium, you may need to adjust the controls in the Motion Estimation parameters, even if you increase the Optical Flow Quality.
-
Best uses single pixel accuracy. Use this option if the motion of fine lines is blurred.
-
High uses half resolution accuracy, interpolated to full size.
-
Medium uses quarter resolution accuracy, interpolated to full size. This is the default.
-
If the OpticalFlow does not look correct at a particular frame, move to that frame and reduce the Optical Flow Quality to Medium. Adjust the Motion Estimation parameters until you see a better output. Then increase Optical Flow Quality and finetune the Motion Estimation parameters as necessary. Displaying the Motion Vectors can help you to adjust the Optical Flow.
The Blending menu allows you to specify the mixture of normal frame blending and the optical flow frame synthesis in the output.
- Frame Blending Only does not include any optical flow frame synthesis in the output. This is similar to creating a Velocity Remap effect and can be useful to speed previews.
- Bi-Directional Mix uses a mixture of frame blending and optical flow frame synthesis in the output. The current frame is combined with both the previous and next frame.
- Nearest Mix uses a mixture of frame blending and optical flow frame synthesis in the output. The current frame is combined with either the previous or next frame, depending on which original source frame is closest in time.
Optical Flow Mix determines the percent of Optical Flow synthesized frames vs. frame blending. If Blend Optical Flow is set to 0, only the Optical Flow frames are used in the output. If the Blending menu is set to Frame Blending Only, this parameter has no affect.
Motion Estimation Parameter Group
The controls in this section offer options for improving the motion estimation.
Select the Use Reverse Estimation checkbox to reverse the motion estimation. This can be useful if the object moves to the right. Reverse Estimation treats the next frame as the first and the current frame as the second.
Min. Edge Contrast sets a threshold for the minimum amount of detail in a region. Regions containing less detail than the threshold are treated as having no detail. If your frame includes a lot of motion in areas that are very detailed or small objects, decrease this parameter. Min. Edge Contrast does not depend on the motion, only the texture and detail of the frames.
- Note: If your effect includes Optical Flow errors that are localized to small areas where the image is moves together, increase Min. Edge Contrast to 200 or 400. If errors occur at motion boundaries, decrease Min. Edge Contrast to approximately 50.
The Enable Low Velocity Correction checkbox sets a threshold for detecting motion in a region. If the Optical Flow moves an area that should not move, select this checkbox and adjust the Low Velocity Correction value. If this checkbox is not selected, Low Velocity Correction has no affect.
Velocity Limit constrains the magnitude of motion estimation. Decrease this value if the motion estimation appears incorrect. This value corresponds to a percentage of the size and resolution of the Source Layer. For example, when working with a D1 image, the value of 100 corresponds to approximately 100 pixels.
- Note: If the estimated motion is larger than the actual motion, the image will distort and the motion vector display will show long motion vectors. If this occurs, try decreasing Velocity Limit to approximately 50.
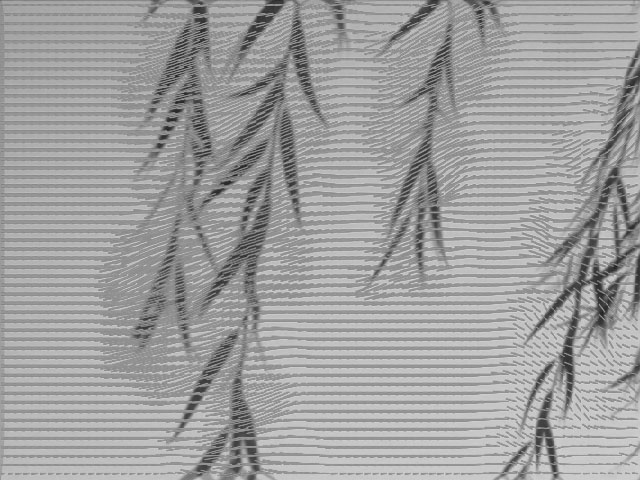
The Composite Motion Vectors menu displays onscreen motion vectors. The array of vector lines indicate the direction of motion of the pixels in the image in the current frame.
- Off does not display motion vectors.
- Draft Only displays motion vectors but does not include the motion vectors in the rendered effect. When you use the Draft Only option, you must preview in Draft mode in your host.
- Render displays motion vectors and includes the motion vectors in the rendered effect.
Motion Vectors Parameter Group
These parameters control onscreen motion vectors. An array of vector lines indicate the direction of motion of the pixels in the image in the current frame. If you find an area in the effect that doesn’t look correct, turn on the vectors to view the estimation. For example, something in your image is not supposed to move. When you turn the vectors on, you see large motion vectors over the object. To correct this problem, you can add a keyframe and increase Low Velocity Correction or the Velocity Limit.
 |
 |
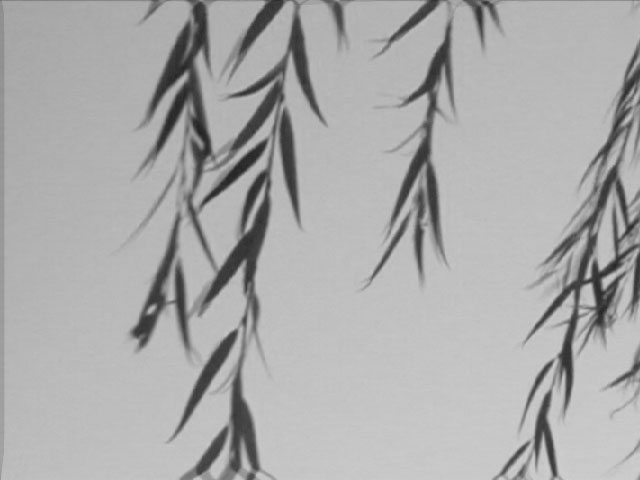
| Motion Vectors=off | Motion Vectors=on |
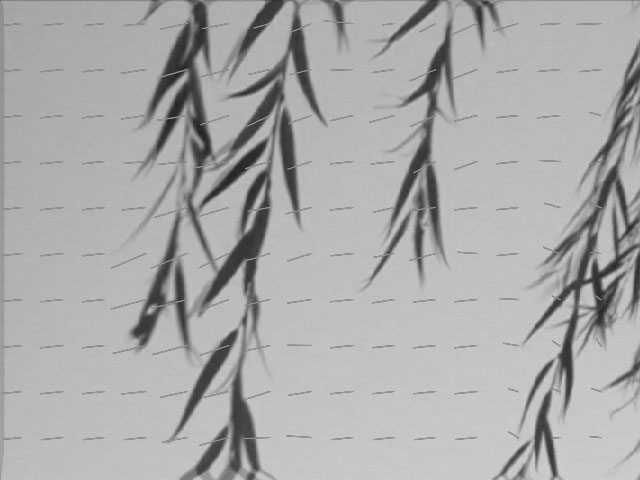
Display Density adjusts the number of vector lines which appear in the composite. Higher values produce more vectors. If the Composite Motion Vectors menu is set to Off, this parameter has no affect.
 |
 |
| Display Density=2 | Display Density=10 |
Drawing Scale controls the length of the individual vector lines. Higher values produce longer lines. If the Composite Motion Vectors menu is set to Off, this parameter has no affect.
 |
 |
| Drawing Scale=10 | Drawing Scale=10 |

