< Previous | Contents | Manuals Home | Boris FX | Next >
Output Settings
Once you've set up the Lens Settings and clicked OK, the Output Settings dialog will appear (unless you're working with an anamorphic lens, in which case the anamorphic settings dialog will appear first, then the Output Settings).

While the Lens Settings are concerned with what to compute, the Output Settings are concerned with what should be done with the results once they are calculated.
IMPORTANT : Once you're done with the Output Settings and hit OK, processing will begin. It can take a seconds to minutes and SynthEyes will appear to be hung in the meantime. This is because we're using Sizzle to control the complex calibration process and make modifications to it easy but Sizzle doesn't currently have the ability to run the calibration as a background process with a progress bar and cancel button.
The most important of the Output Settings is the workflow method. It is essentially the same as with the Lens Workflow script that determines what to do with the results of any distortion calculated by the solver.
Here are the choices:
- Lens Workflow #1 . The resulting image is zoomed in so that it does not contain any missing pixels; typically these images will be used directly as the final output.
- Lens Workflow #2 . The resulting image is zoomed out so that every pixel of the input image appears somewhere in the output. Ultimately additional images to insert will be rendered in this format, then redistorted so that they can be composited with the original image. This preserves the distorted look of the original (an artistic choice), and permits the highest output image quality by never resampling the original images.
- Create 360VR . The output image is an equi-rectangular 360° VR image. This enables images with wide field of view (typically from 100° up to and past 180° degrees for extreme fisheye lenses). An exact field of view for the camera must be supplied (linear cameras) or computed (fisheye camera or via the Random Dots method).
- None . No workflow processing is performed, typically this is used just to get a quick look at the calibration results, for example to see which lens type to use.
And now sample images:
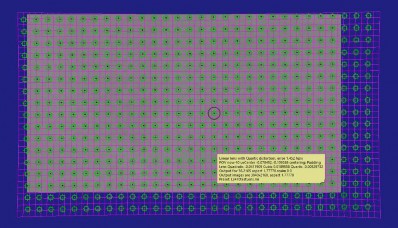
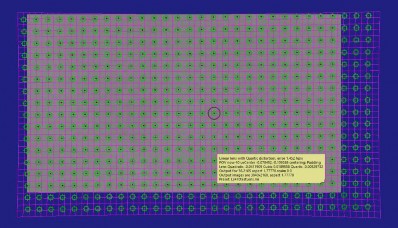
Workflow #1. Centered by Padding. Only a portion of the input image is used, you can still see the trackers on dots that fall outside the usable area. |
|
Workflow #2. Centered by Padding. There's a lot of padding. |
|
|
Workflow #2. Centered by Re-aiming. The image is only somewhat larger. (Note that the border is extended, rather than filled to black.) |
|
|
360VR Workflow. With a narrow field of view, the original image only occupies a small portion of the outgoing 360VR image. |
|
Tip: The purple grid is from a projection screen mesh generated by the lens calibration. If your entire screen is purple, turn off Solid Meshes! The projection screen can be textured with the shot (via the perspective view) and exported as one way to export lens distortion.
Once you've decided on the overall workflow, you can decide on the re-centering method, either Padding or Re-aim. This is relevant only when the lens center is being
computed, or has non-zero initial values. The Padding method uses the image preprocessor method to pad out the image to re-center it, while maintaining the same overall image aspect ratio; this is the method used in the Lens Workflow script and earlier SynthEyes lens calibration code. The re-aim method creates a synthetic keystoned re-aiming, similar to what happens with image stabilization; it results in less padding being required on the image. The re-aim method can only be used when an image map preset is being generated (keep reading).
The Lens Master Calibration can generate an image-preprocessor-based preset, a LNI- based preset, or an image-map based preset. These are selected via the Preferred preset type dropdown.
- Image preprocessor . The image preprocessor is configured to achieve the lens undistortion. No preset file per se is generated. The desired effect must be achievable only with the image preprocessor, ie a linear camera with distortion and padding-based recentering (no fisheyes and no anamorphic). You can save the overall SNI file to use as a basis for subsequent shots, using Shot/Change Shot Images. Or, you can use the File/Export/Lens/Image Preprocessor Preset as Script export to save the result, then load it into other scenes.
- LNI Preset . An "LNI" file (XML-based) contains the setup for the image preprocessor, as well as an arbitrary spline-based distortion curve. The LNI files can be stored and later used as presets from the dropdown on the Lens tab of the image preprocessor. When you select the LNI file, not only will the lens distortion profile be set up, but padding and other image preprocessor settings will be preconfigured as well. LNI files cannot specify re-aiming or anamorphic parameters, however.
- Image Map . A UVmap/STmap image distortion map is created to store distortion, anamorphic, and reaiming effects, all wrapped up into an image (two, see below). The image distortion map can be used as a preset in SynthEyes, and can also be used directly in other applications that support this method, including Fusion and After Effects.
The preset type dropdown is a minimum suggestion: if you have called for more advanced capabilities than a method can accommodate, then a more advanced method is automatically used.
Also image map. Checkbox. When checked, image distortion maps will be written even for the Image preprocessor or LNI Preset modes. This is useful for sending distortion maps to other applications, in addition to the SynthEyes lens presets.
When Image Map is selected (directly or via the checkbox), two maps are written, a forward and an inverse map. The inverse map has an additional suffix on the file name, specified by a preference. See Lens Distortion Interchange via Image Distortion Maps in the SynthEyes User Manual for more information about image distortion maps.
Maximum Output FOV. Number. When creating lens presets for wide-angle fisheye lenses in Workflow #2, as the required field of view approaches 180°, the required output resolution becomes larger and larger. You can limit the maximum field of view, and thus output resolution, with this control.
Maintain resolution. Checkbox. When checked using Workflow #2, the output image size will be increased to try to maintain pixel density equivalent to the original image at its center.
Margin. Number. This is the number of extra safety pixels around the edge of workflow #2 images. Applied before any final width/height/aspect override. The margin will typically be approached only in a single corner of the image. There can be a little rounding error on it; also note that the image is intentionally interpolated outward a little ways, to help avoid edge effects in downstream compositing applications.
Multiple of 16. Checkbox. When changing the image resolution, make sure the new width is a multiple of 16, which may be required for some codecs.
Use size and aspect overrides, Override width, Override height, Override aspect ratio . Checkbox + 3 Numbers. When the checkbox is checked, the width, height, and aspect values will be used to set the output image size, ie on the image preprocessor's Output tab. You can use these if you want direct control over the final output format.
Apply fix to scene. Checkbox. When checked (usually), the newly-computed preset is applied to the scene, so that you see the final output result. You can uncheck this to try out some different lens calibration settings one after another without updating the scene. A note will be added each time, however, regardless of this setting. You can build up a number of those notes in the scene for comparison.
Put preset/map... Drop-down. With scene file/With image file/in User preset folder/in System preset folder/Other. This dropdown controls where the generated preset and/or image maps will be placed. To make it available for selection on the image preprocessor's lens tab, it needs to be placed in the user or system preset folder. (You must have appropriate operating- system permissions to write to the system preset folder.)
'Other' folder for preset...Browse. Browsable folder name. When the Put preset/map... dropdown is set to Other, this field supplies the folder name.
Image Map type. Drop-down. Selects the file type for image maps. It must always support floating point, or at least 16bit, formats. See 'Lens Distortion Interchange via Image Distortion Maps' in the manual for discussion.
Map compression. Button. Bring up the compression settings dialog for the selected image map type. Compressing a map file must be done with care: do not use lossy compression methods!
Overrange OK in map. Checkbox. Turn this on if you want to see red and green values over 1 or under 0 in the image maps for off-edge pixels. These may allow out-of-window pixels to be used in some apps.
Write scripts. Checkbox. Write Sizzle scripts to configure the image preprocessor to later undistort or redistort a just-opened shot using the image maps we’re producing now. This
makes setup easier and more accurate. The scripts are written to the same folders (and same names) as the image maps. Use Script/Run Script to run the script and apply the map preset.
Vertical grids. Number. The number of vertical grids in the undistortion mesh produced after calibration. The horizontal count is determined by multiplying by the aspect ratio.
Note that the generated grid can have problematic corners when the distortion field would have doubled back at those locations, ie they are unreachable. The corners can be minimized by increasing the grid count, and sometimes by switching to Inverse Linear, although the fit may not be as good.
©2023 Boris FX, Inc. — UNOFFICIAL — Converted from original PDF.


